A customer announcement can be short and still need a surprising amount of editing. A long pause interrupts the explanation. A repeated sentence makes it drag. A false start leaves the viewer waiting for the instruction to begin again.
For this tutorial, I used CutBay AI’s Talking Head Editing on my own webcam recording for Cedar Lane Goods, a fictional shop introducing pickup for online orders. I deliberately included pauses, hesitation sounds, a repeated collection-hours sentence and an abandoned sentence opening. The walkthrough compares the original with CutBay’s result, then checks the subtitles, supporting footage and export options.
In the recorded comparison, I point out the removed hesitation sounds and repeated hours sentence, as well as a shortened restart before the order-number instruction. The subtitles and supplied B-roll also change how the announcement is presented. Here is the workflow, along with useful editing options from CutBay’s documentation that you can use when refining your own result.
What Talking Head Editing does
This workflow starts with a recording you already have. It offers speech cleanup alongside subtitles, motion graphics, B-roll and background music. It is separate from the Chat to Video workflow used in our CutBay animated explainer tutorial, which starts with a written brief.
CutBay’s talking-head help guide describes choosing cleanup options and presentation layers before selecting Start Processing. You can combine cleanup with presentation elements, then refine the result in the editor.
Before you start
Keep an untouched copy of the original recording. You will need it to compare the exact passages that caused trouble. For a real customer announcement, also keep a short list of facts the edit must preserve: what customers should do, when they can do it, and any condition that changes the meaning.
The Cedar Lane example has an important distinction: an order confirmation does not mean an order is ready. Customers must wait for a separate ready-to-collect email. Collection is Tuesday through Saturday, 10 AM–4 PM, and customers should bring their order number. A cleaner delivery is not useful if it loses those instructions.
Open CutBay in your browser and sign in. CutBay recommends Chrome in its getting-started guide. Prepare the source recording and any supporting footage you have permission to upload; avoid real customer records or private order details in demonstration assets.
CutBay’s upload guide lists MP4, MOV, MKV, AVI and FLV as supported video formats. Check the size and duration limits in the Talking Head Editing upload form before choosing a source file; limits shown for a different workflow may not apply to this one.
Step 1 Add the original recording
Choose Talking Head Editing from the sidebar and add the webcam recording under Primary Media. Use the version that still contains the pauses and repeated takes. If another editor has already removed them, you will not be testing CutBay on the same source.
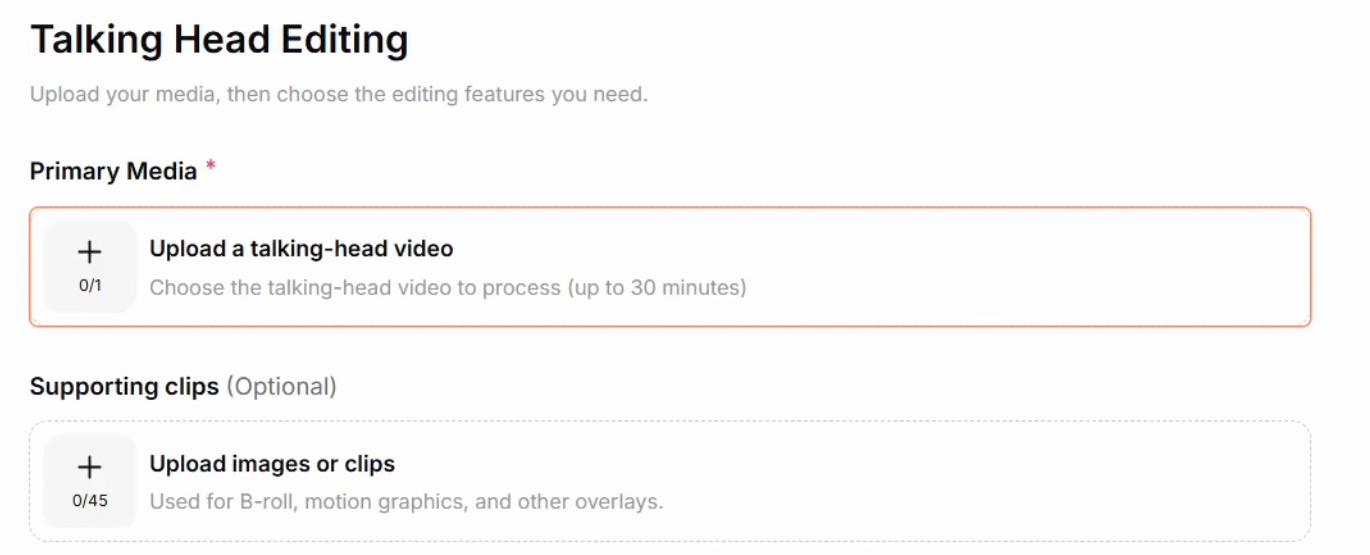
The sample is a straightforward customer announcement, which makes the comparison easy to follow. You can apply the same approach to a service update, a short lesson or a product explanation: choose one recording with a clear message and check whether the edit preserves it.
Step 2 Supply B-roll that explains the message
Add optional supporting images or clips under Supporting clips. In this demonstration, three short illustrative clips cover packing an order, showing an order number and collecting at a counter. They give the editor relevant material instead of leaving every visual choice open.

I created these illustrative clips separately with Google Flow, then supplied them to CutBay. This gives the editing process footage that matches the announcement: a parcel being packed, an order number and a collection counter. CutBay places that supplied material into the presentation.
I also enabled Use AI-generated images for any extra illustrations that might be needed. That is separate from the three supplied video clips. For a real business, label illustrative material accurately and avoid presenting a fictional shop or order as a real customer transaction.
Step 3 Select cleanup and presentation options
The final settings used in the tutorial enable Trim pauses, Remove filler words and Remove repeated takes. Create jump cuts is left off.
- Trim pauses: target the long empty gaps while preserving enough space for the listener to follow the instructions.
- Remove filler words: target the isolated hesitation sounds without clipping the word that follows.
- Remove repeated takes: keep one complete collection-hours statement and inspect the abandoned order-number opening.
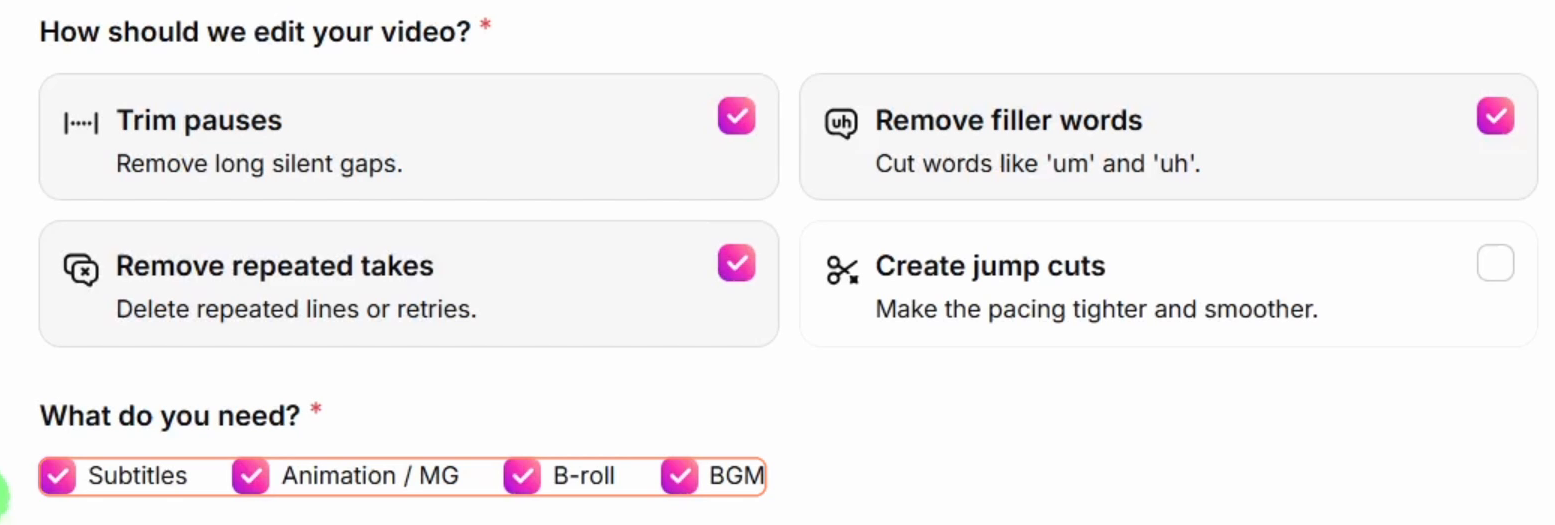
The tutorial also enables Subtitles, Animation / MG, B-roll and BGM. BGM means background music. These layers have different jobs: subtitles carry the spoken message, graphics can summarize the pickup sequence, supporting footage illustrates the steps, and music provides a background bed.
You do not need every layer for every announcement. Start with what helps a customer understand the message. A useful supporting shot can clarify a process; too much text and movement can compete with the instruction you are trying to explain.
Step 4 Protect the facts in Additional Instructions
Use Additional Instructions to connect the selected options to the actual recording. Tell the editor which parts to clean up, which facts to keep and how the supporting clips should relate to the speech. Preserve the original speaker and voice rather than inviting a new narration.

The video’s opening request is to preserve the original speaker, voice and meaning. The following example adapts that approach and the demonstrated settings into a copyable prompt. Replace the fictional shop details with the facts in your own video.
Copyable example for a customer announcement
Edit this webcam recording as a customer announcement for fictional Cedar Lane Goods. Use the selected cleanup and presentation options while preserving the original speaker, voice and meaning. Do not synthesize new speech or invent additional terms.
Trim long silent gaps while retaining natural short pauses. Remove isolated “um” and “uh” fillers. Keep one complete collection-hours statement. Remove the abandoned beginning of the order-number sentence while retaining the complete instruction that follows.
Preserve these facts: order online and choose pickup; wait for the separate ready-to-collect email before visiting; an order confirmation does NOT mean the order is ready; collection is Tuesday through Saturday, 10 AM–4 PM; bring the order number; check the items against the order and ask at the counter if something is unclear. Do not invent contact details, a launch date, an offer or a guarantee.
Add accurate, high-contrast subtitles in short readable phrases, clear of the face and frame edges. Use restrained graphics for “Choose pickup → Wait for ready email → Collect with order number” and an hours card reading “Tue–Sat | 10 AM–4 PM.” Avoid competing captions and graphics.
Use the supplied illustrative packing, order-number and counter clips where their subjects are mentioned. Keep the presenter visible for the main explanation and closing. Use AI-generated images only where an additional relevant illustration helps.
Add quiet instrumental background music below the original speech. Preserve landscape 16:9. Do not add contact details, extra claims or unrelated footage.
A clear request gives you something concrete to review. It does not guarantee that a repeated take, caption placement or music level will be correct on the first attempt.
Step 5 Process and compare the same passages
Once the recording, supporting media and instructions are ready, select Start Processing. CutBay processes the recording and assembles the requested cleanup and presentation elements into a preview you can review.
When processing finishes, compare a passage from the original with that same passage in the result. The walkthrough begins with the original before switching to the edited version. This is more useful than comparing unrelated sections that happen to look better.
The walkthrough’s comparison identifies three removed hesitation sounds, the removed duplicate collection-hours statement and a shorter order-number restart. The restart was shortened rather than completely removed. Check those sentence beginnings carefully in your own recording, even when the repeated-takes option is selected.
For your own result, listen through the joins as well as the words. A cut may remove an “um” but leave an abrupt breath, a clipped syllable or an uncomfortable change in posture. Confirm that one complete correct instruction remains and that the ready-to-collect condition has not been weakened.
Step 6 Review subtitles and supporting visuals
Watch the result once without sound. Can a customer read the shop name, hours and pickup instruction before the text changes? Pay particular attention to “does not mean” in the order-confirmation sentence. Missing that short phrase would reverse an important instruction.
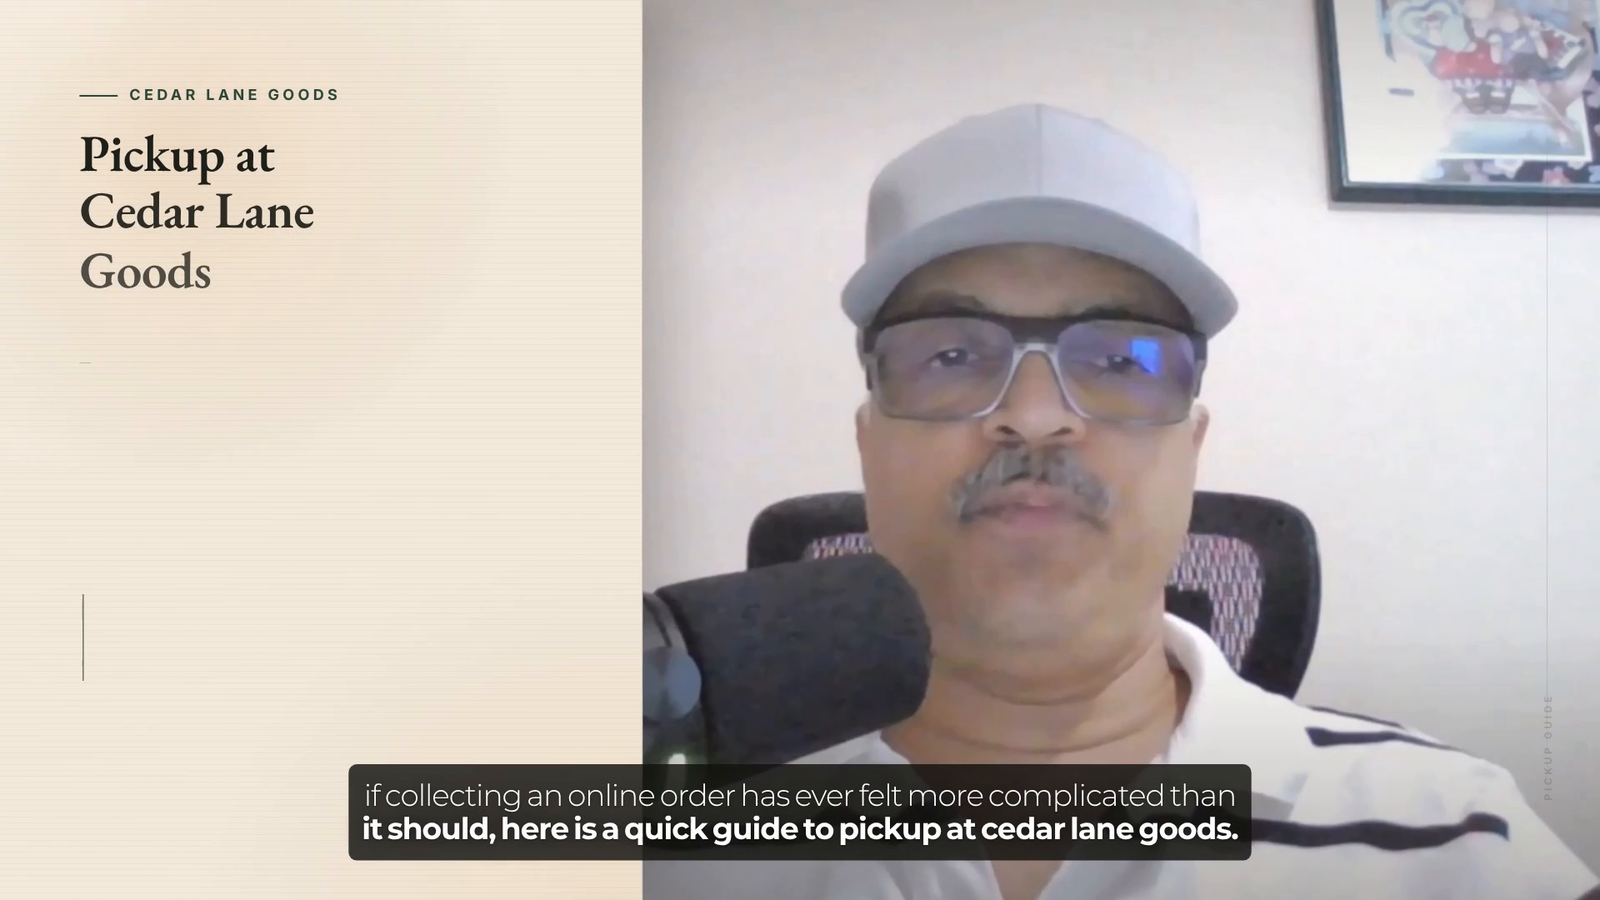
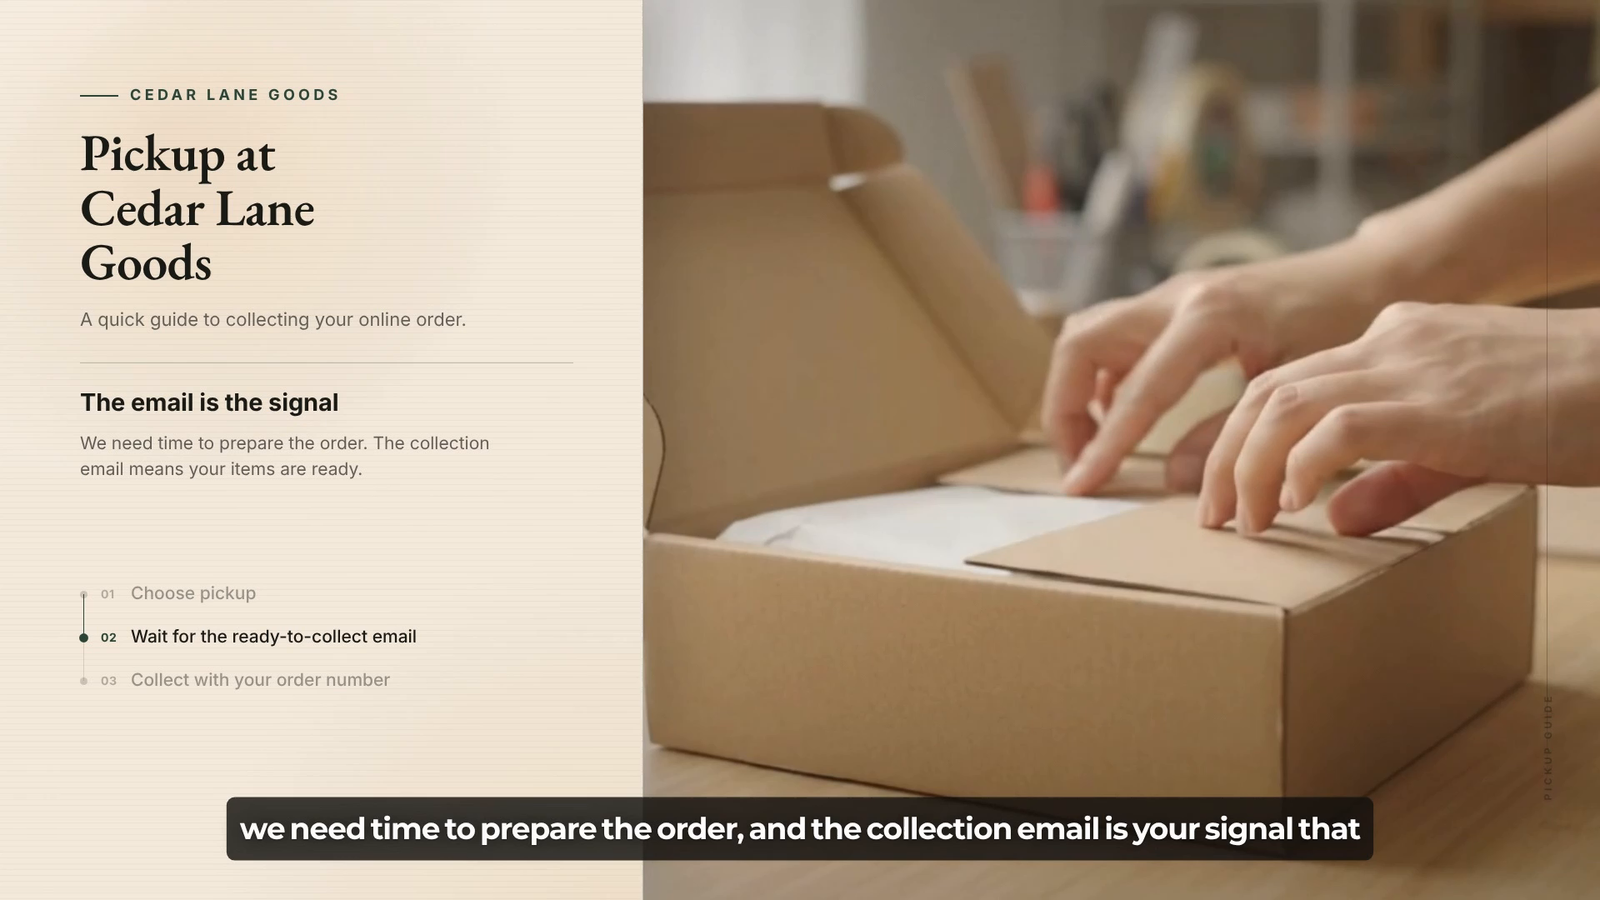
Then inspect the supporting shots in context. The packing clip is useful when the announcement explains preparing an order. A clip should appear because it explains that sentence, rather than simply filling time.
Listen with sound again to judge the music. The voice should remain easy to understand, especially during the hours and ready-email instructions. If the music competes with the voice, the official volume guide describes separate music and narration controls under Volume at the bottom-left of the canvas. Lower the music there and replay the same passage to judge the balance.
Step 7 Make a focused correction when needed
The editor provides chat for further changes. CutBay’s editing guide describes requests involving text, layout, length and audio. Make one clear correction at a time, then inspect the result instead of assuming the rest stayed unchanged.
For example, if captions overlap the presenter’s face, a useful follow-up would be: “Move the subtitles clear of the presenter’s face and frame edges. Keep the wording, timing, original voice, cuts and supporting footage unchanged.” This is a suggested correction, not an additional result demonstrated in the tutorial.
For an ordinary text correction, the official text-editing guide also describes selecting text on the canvas and using the pencil icon. The toolbar provides font, size, color and background controls. This gives you a direct way to fix a visible text element without requesting a broad redesign.
If a revision moves away from the result you wanted, the getting-started guide explains the History tab at the top of the right-hand panel. Preview an earlier version, select it, then return to chat to continue editing from it. Return to Latest takes you back to the newest version. This is a documented recovery option, rather than a step demonstrated in the video.
Step 8 Export and check the downloaded file
Select Export when you are satisfied with the edit. The panel shown in the tutorial has MP4, Standard quality, 30 FPS and 1080p selected. These are the announcement’s export choices, separate from the settings used to record the longer tutorial.
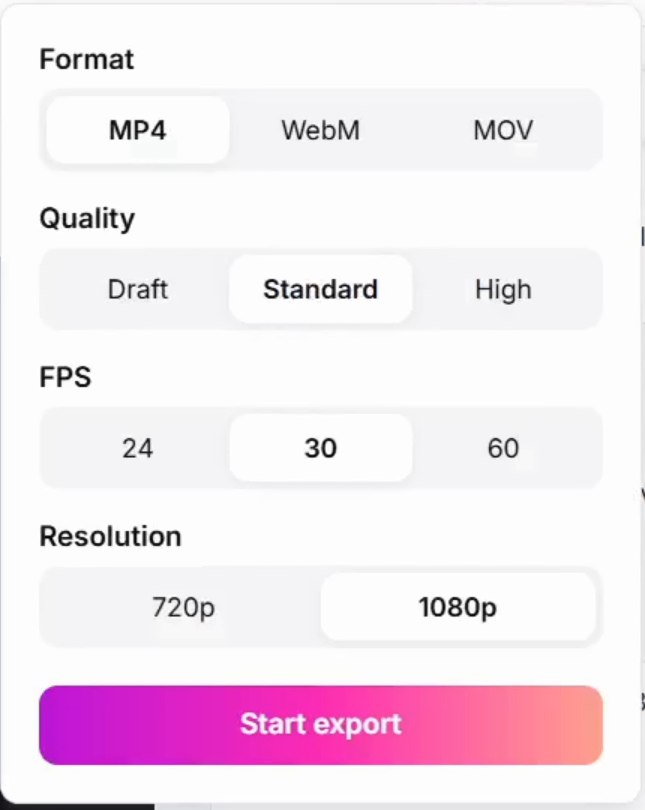
CutBay documents MP4, WebM and MOV export formats, followed by quality, FPS and resolution selections and Start export. Available choices should be checked in your account. Export settings guide.
Reopen the downloaded announcement and play it all the way through. Check the beginning and ending, caption readability, audio, duration and any watermark. If a download fails, CutBay recommends refreshing and retrying, then updating and relaunching Chrome if the issue persists. Export troubleshooting.
Keep the announcement clear
This example shows why talking-head cleanup is worth testing on a real message: the repeated hours and hesitation sounds provide concrete before-and-after checks, while the pickup details give you facts to protect. The supporting clips and subtitles are useful only when they make that message easier to follow.
Use CutBay’s result as an edit to review. Compare the original trouble spots, check the customer instructions and inspect the downloaded file before sharing it. For more practical workflows and examples, join the free AI Stack community.