A folder of portraits or website screenshots can show what a business does, but it does not always give those assets a clear presentation. A short animated video can guide attention from one person or project to the next, then finish with a memorable business name and a reason to get in touch.
In this tutorial, I use two CutBay templates to turn prepared images into business visuals. The first creates a people showcase from five portraits and matching names. The second builds a website-services promo for the demonstration brand Northline Web Studio, using nine website concepts, a logo, portraits and a background image.
The important part is understanding what each template lets you supply, then reviewing what appears in the result. The two examples use different entry points and different fields. Here is the complete workflow, with practical editing guidance from CutBay’s documentation to help you adapt it to your own business.
How this template workflow works
CutBay is a browser-based video creation and editing tool. In the workflow shown here, you select a prepared template and complete its available fields. You are working with an existing visual structure rather than starting with an unrestricted Chat to Video brief.
CutBay’s template guide describes previewing a template, choosing Remix and completing its requested inputs before selecting Generate Video. The required information varies with the template. Some ask for a brand and images; others use data or documents. Preview the structure first so you know whether it suits the story you want to tell.
The carousel is useful when the people are the subject: a team introduction, speaker lineup or creative portfolio. The more involved business promo gives several website designs a shared identity. These are ways to adapt the demonstrated formats, rather than additional examples tested in the video.
Open CutBay in your browser to follow along. If you want to build an explainer from a written brief instead, see the CutBay animated explainer tutorial. If you already have a presenter recording to clean up, the talking-head editing tutorial follows that separate workflow.
Prepare the images before choosing Generate
For the carousel, prepare clear portraits with one person in each image and a matching list of names. Keep the upload order consistent with the list. Similar framing makes the cards easier to scan, and some space around the face gives the template room to crop.
For the website promo, prepare screenshots or concept images that show distinct examples of your work. The tutorial uses a café, fitness studio, home-care business, homeware collection, architecture site, plant shop, hotel, photography portfolio and bakery. These are supplied website concepts; CutBay is animating the images, not building those websites.
CutBay’s upload guide lists PNG, JPEG/JPG, WEBP and GIF as supported image formats. Check the current upload requirements and the chosen template’s own helper text before adding files. A general upload allowance is different from the number of images a particular composition needs. Use images and portraits you have permission to use, and keep private customer information out of screenshots.
Step 1. Open the portrait-carousel template
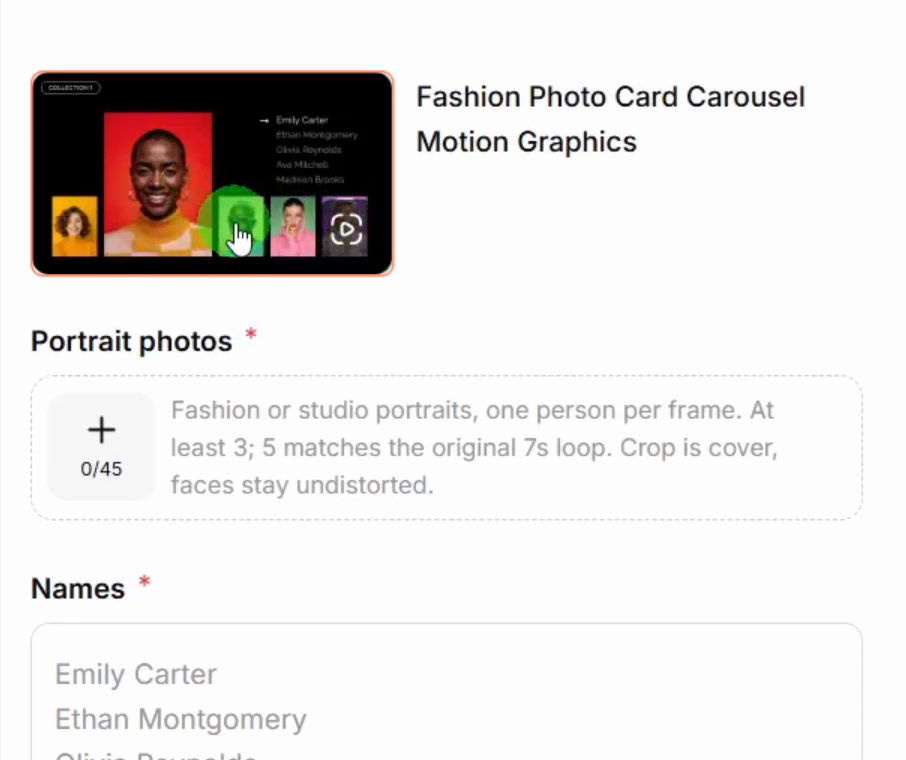
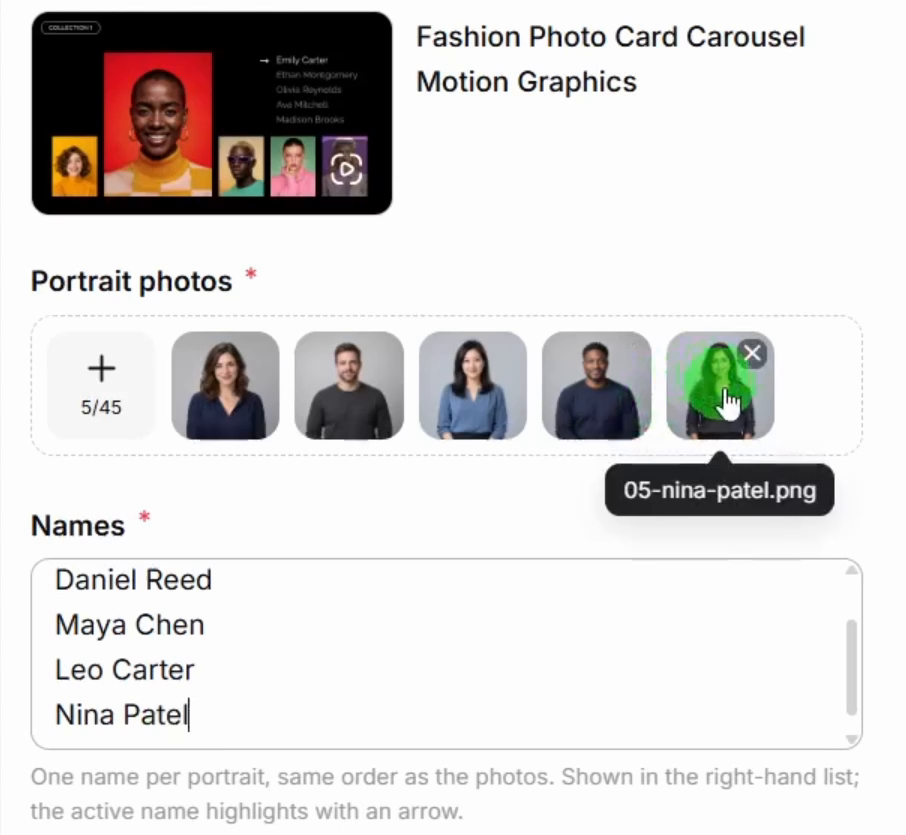
Choose Motion Graphics in the sidebar and search for Fashion Photo Card Carousel Motion Graphics. Select the template and inspect its fields before uploading.
In the recorded interface, Portrait photos and Names are required. The portrait helper asks for at least three images and says five matches the original seven-second loop. That explains the five-image choice in this example; it is guidance for this template, not a universal requirement for motion graphics.
Step 2. Match the portraits and names
Use the plus button under Portrait photos to upload the five portraits. Then enter one name per portrait in Names, in the same order as the uploaded images. The tutorial uses the following names:
Ava Brooks
Daniel Reed
Maya Chen
Leo Carter
Nina Patel
Before generating, compare the image row with the name list from left to right. A correct spelling is not enough if it labels the wrong person. The additional prompt is left unused in this example because the template fields provide the needed inputs.
Step 3. Generate and review the carousel
Select Generate Video and play the result. The demonstration shows the uploaded portraits moving through the card arrangement while an arrow highlights the active name. Watch a complete cycle to check every person, rather than judging only the opening frame.
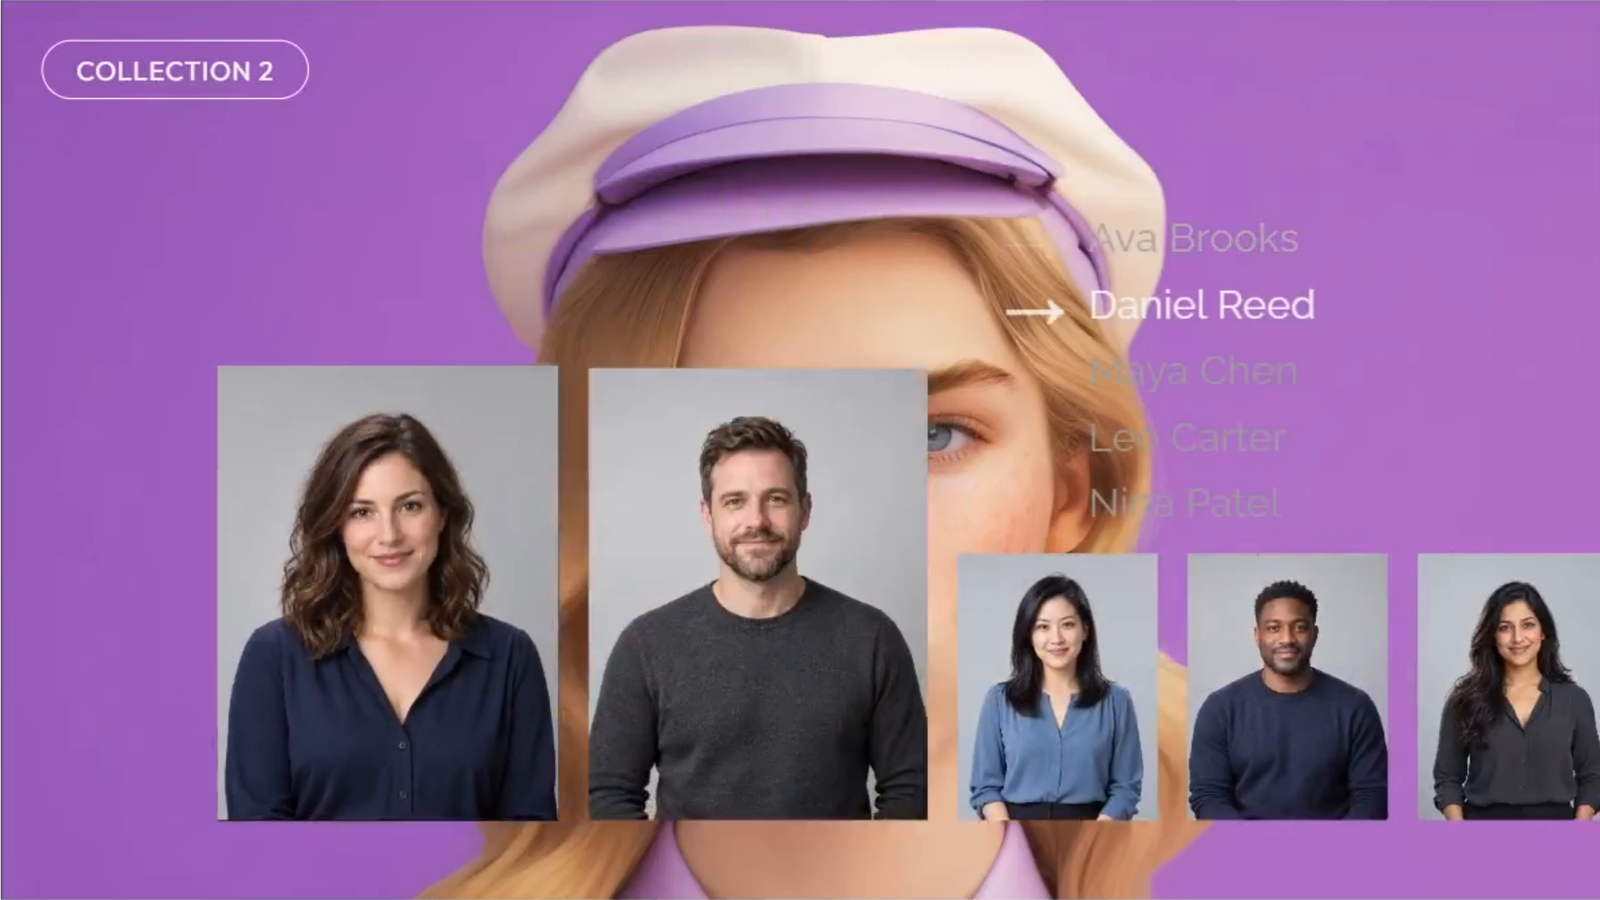
Notice that the result also retains a large fashion image behind the portrait cards and a COLLECTION label. Uploading new portraits does not mean every template element has changed. For a team introduction, review those background elements and ask for a more suitable treatment if they distract from the people you want to introduce.
CutBay provides a chat field for describing further changes. A suggested follow-up would be: “Replace the large fashion background with a plain background in our brand color. Keep the five uploaded portraits and their name order unchanged.” This is an example revision request, not a correction demonstrated in the tutorial.
Step 4. Find the website-promo template in Explore
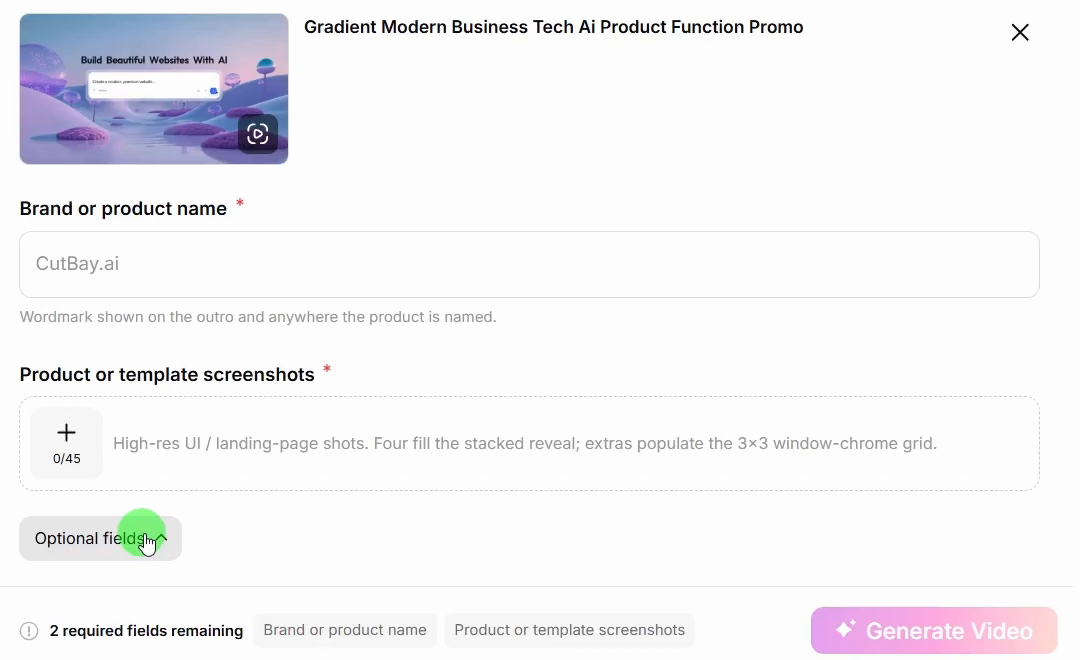
For the second example, open Explore and browse Marketing. The template used is Gradient Modern Business Tech Ai Product Function Promo. In the recorded session, this motion-based promo is found in Marketing rather than the dedicated Motion Graphics category.
Select the template and read the required fields. Brand or product name controls the wordmark used in the outro and where the product is named. Product or template screenshots supplies the website visuals.
Step 5. Add the brand and nine website images
Enter Northline Web Studio in Brand or product name. Then add the nine prepared website concepts under Product or template screenshots.
The helper text explains the layout: four images fill the stacked reveal, and extra images populate a 3 × 3 window-style grid. The tutorial uploads nine images to give the grid nine distinct designs. Prepare strong images for the reveal and enough variety for the grid, then inspect the generated sequence to see how they were used.
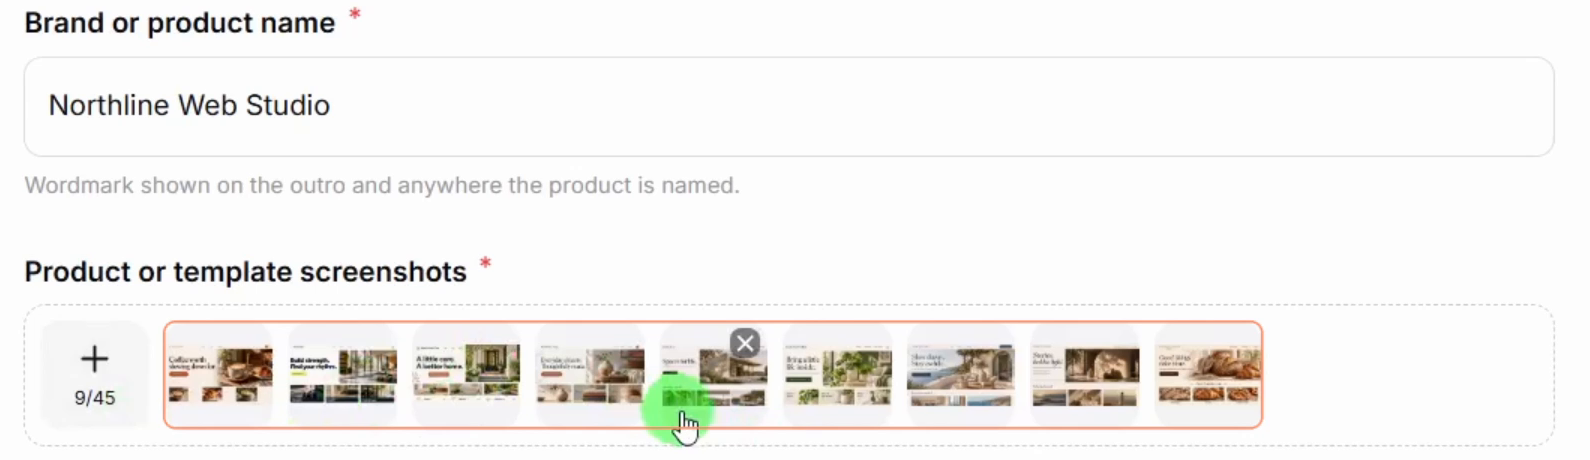
Choose screenshots for the impression they make at video size. A clear hero section, strong image and recognizable layout will communicate more than a long page filled with tiny text. The nine-image grid is useful for showing range; it is not the place to expect viewers to read every navigation label.
Step 6. Complete the useful optional fields
Expand Optional fields. The tutorial supplies a logo, a Website or CTA line, three People photos and an Opening background. These inputs give the template more of the demonstration brand’s identity without changing which fields are required.
The text entered in Website or CTA line is:
Your business. Your next website.
The field helper describes this as a quiet line under the wordmark. For your own promo, decide whether that space should carry a short message or a website address. Keep it brief enough to read during the closing shot.
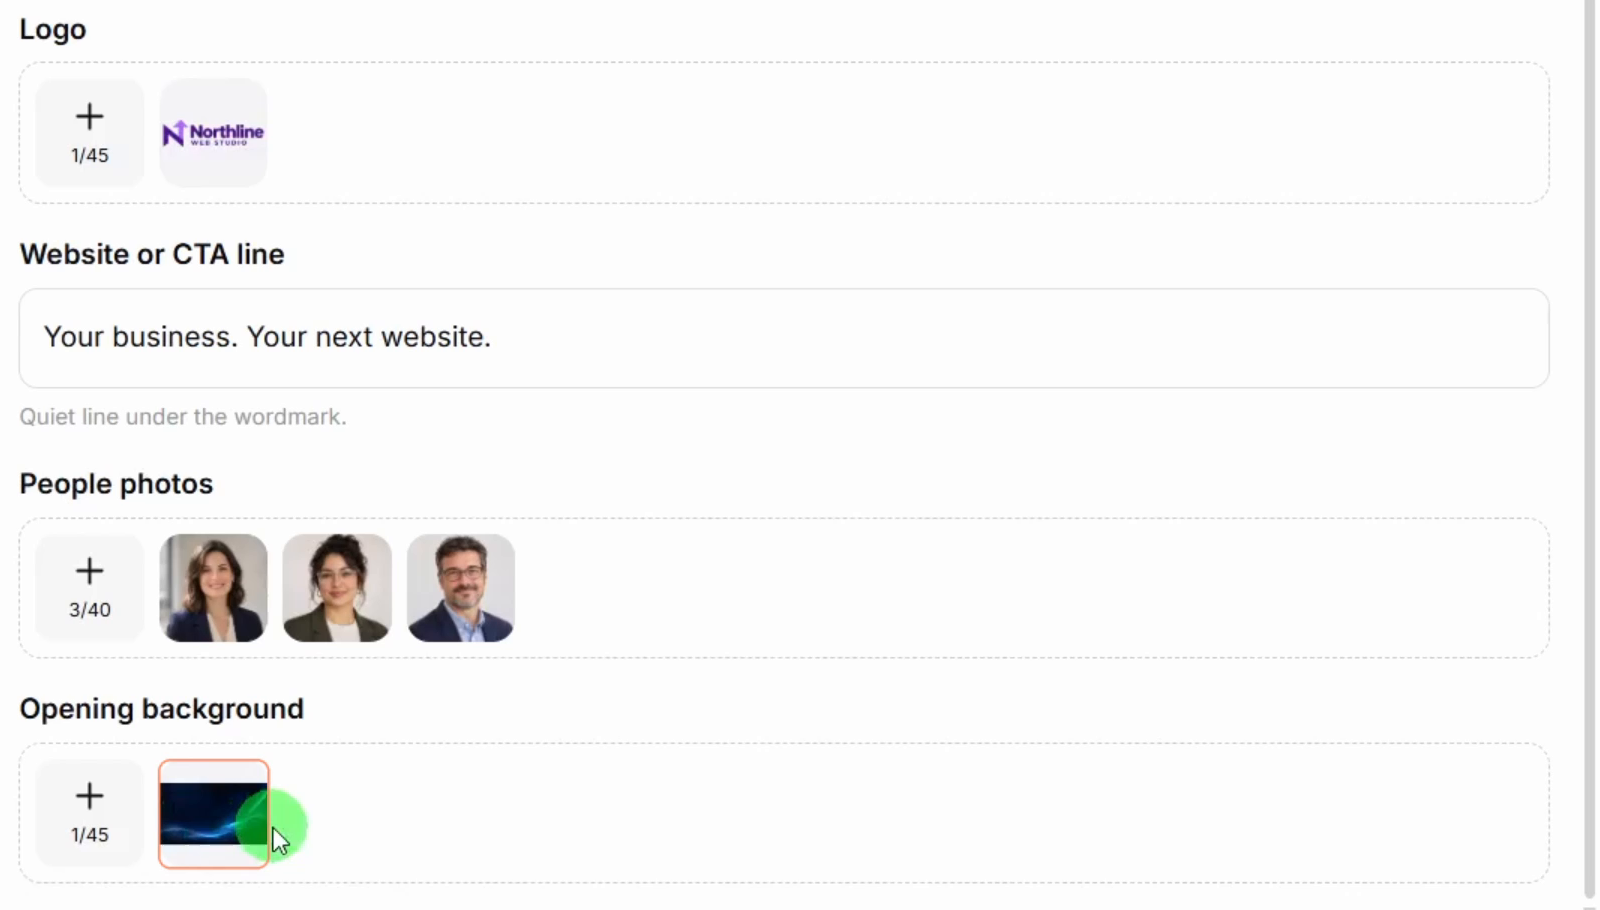
The People photos helper says those images are used for a testimonial card and share-orbit bubbles. The Opening background helper describes a scenic still or muted looping video behind the prompt bar. In this example, a dark blue still image is uploaded. These descriptions help you anticipate where an asset may appear, but the preview is where you check the actual result.
Step 7. Review the promo as a business message
Select Generate Video, then play the generated promo from beginning to end. The demonstration includes an opening branded scene, website displays, the nine-image grid, portrait-based elements, animated text and a branded ending.
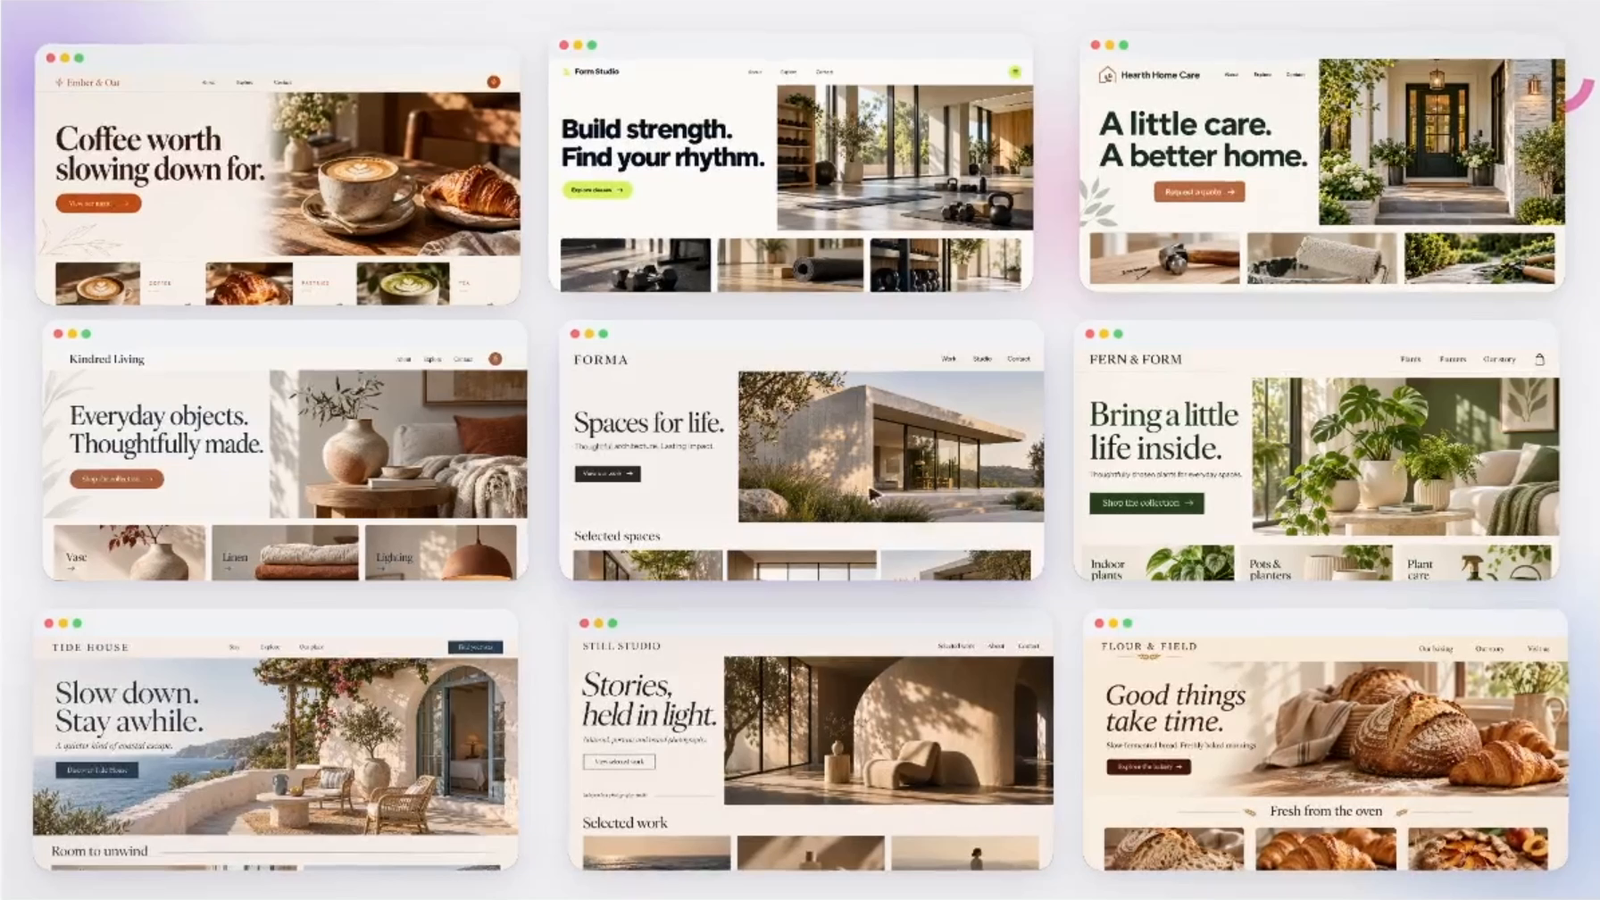
Check the message as carefully as the animation. Does the video show the intended website designs? Are the logo and closing text readable? Does the opening style fit the rest of the piece? Are any template photos or labels still present where you expected your own assets?
The generated Northline example also contains a Client Stories card with a two-week turnaround statement and a five-star review label. Those details were not entered in the form shown in the tutorial. When adapting this template for a real business, replace unsupported quotations, ratings and turnaround claims with approved customer evidence or neutral service information.
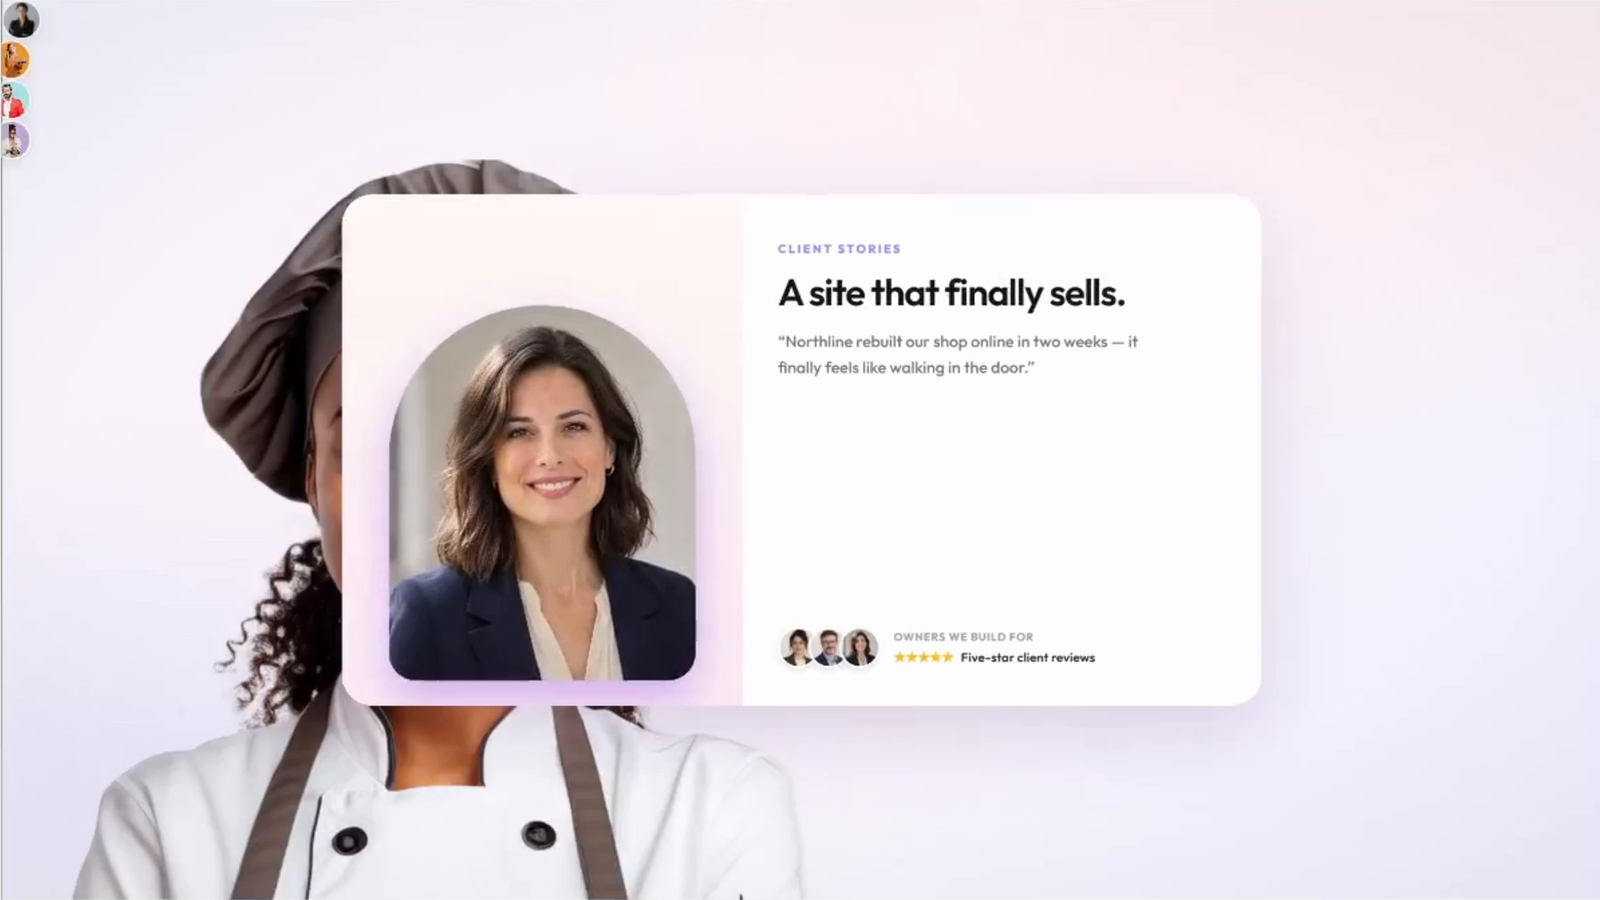
A useful suggested correction is: “Replace the Client Stories quotation and star-rating line with a neutral overview of our website-design service. Remove the two-week claim. Keep the supplied website images, brand name and closing line.” Review the next version to confirm both the requested change and the surrounding scenes.
Step 8. Make focused improvements
The tutorial points out the chat-based revision option. CutBay’s editing guide adds that revisions can address text, layout, style, length and audio. Describe the specific scene or element and the exact change, rather than asking to “make it better.”
For more precise targeting, the scene-navigation guide describes locating a scene with Play or the Scene selector and using Add to Chat. If a face or logo is poorly framed, CutBay’s cropping guide describes selecting the image or video on the canvas, choosing Crop, adjusting the framing and clicking a blank area to apply it.
These are documented editing options beyond the demonstrated form-filling steps. After a change, replay the affected scene in context. Check the beginning and end of the animation too, since a crop that looks good in one frame may not suit the whole movement.
If a revision goes in the wrong direction, CutBay’s History feature lets you reopen an earlier version to continue editing or download it. If manual controls appear unavailable while a revision is being generated, CutBay documents that canvas editing is temporarily disabled during generation. Wait for the new version to finish before making a manual adjustment.
Step 9. Export and inspect the downloaded video
When you are satisfied, select Export. The tutorial leaves the displayed defaults unchanged: MP4 format, Standard quality, 30 FPS and 1080p resolution. These are the generated promo’s export settings, separate from the frame rate of the longer tutorial recording.
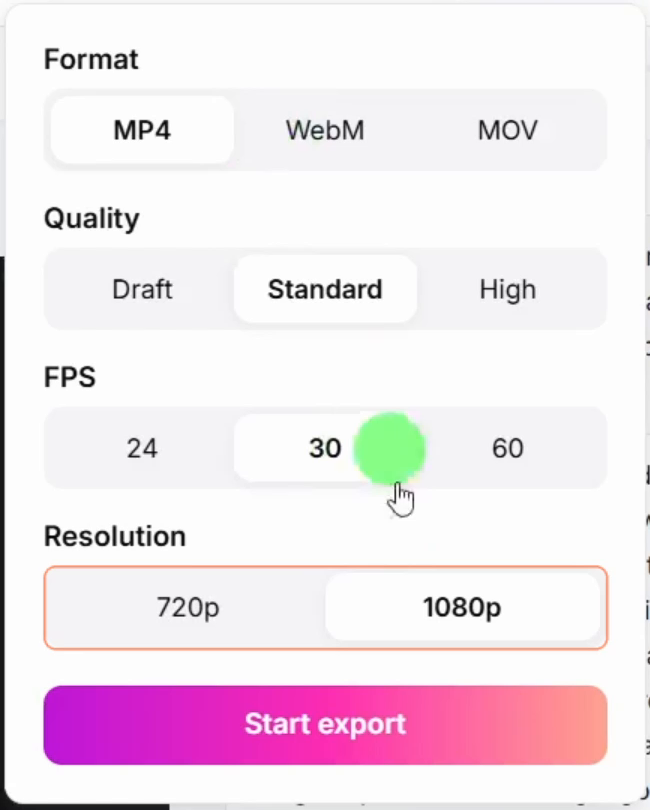
CutBay’s export guide also documents WebM and MOV, along with quality, frame-rate and resolution controls. Choose settings that suit the destination where you plan to use the video, then select Start export.
The demonstration reaches an Export Successful message and a Download video button. If the download does not start automatically, use that button. Open the downloaded file and check the complete video, including text readability, framing, audio, the final CTA and any visible branding or watermark.
Start with the message, then use the template
These two examples show how prepared assets can become a more structured presentation. The carousel makes people and names the focus. The website promo brings several designs together with a business identity and closing message.
Choose a template for the story it helps you tell, supply the right images and text, then review what it actually produced. Matching portraits, clear website examples and accurate claims do more for a business promo than adding motion alone. For more practical AI workflows and resources, join the free AI Stack community.